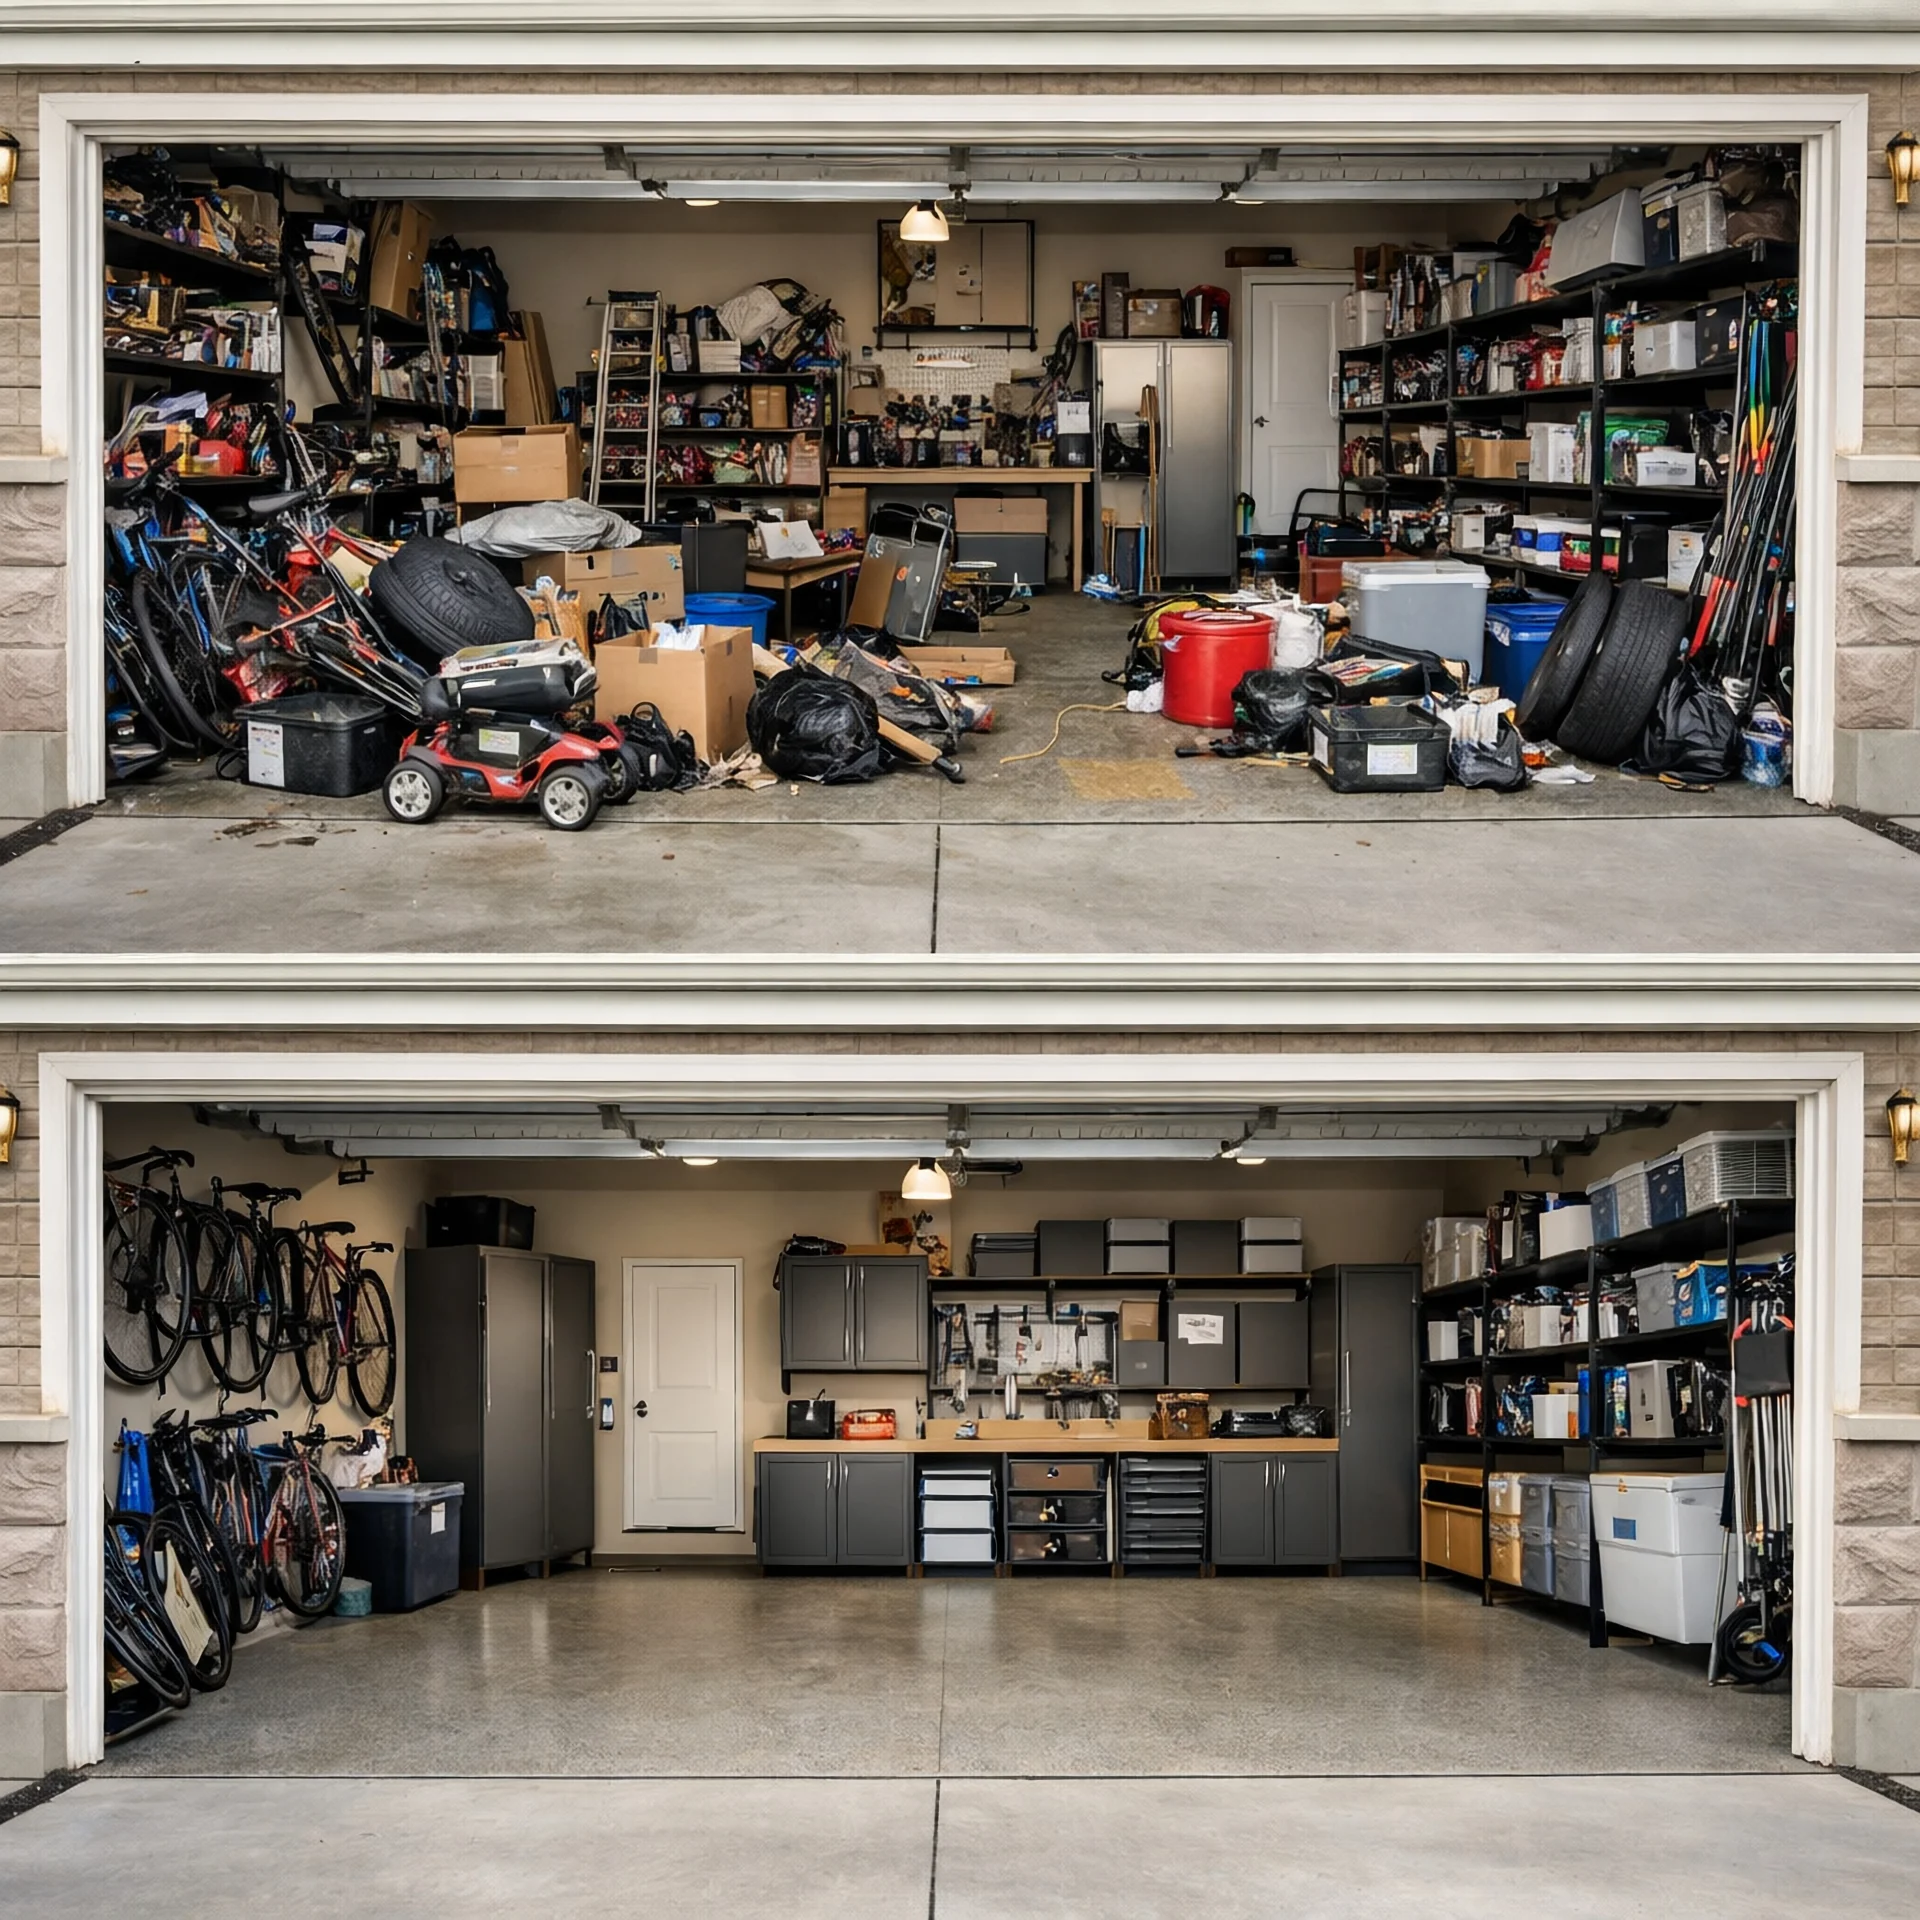
The best way to organize your garage is to start by clearing everything out, sorting items into categories, and measuring your space before buying any storage solutions. From there, set up dedicated zones and get things off the floor using wall tracking, overhead racks, and custom cabinets.
Most garages don't turn into a mess overnight. They fill up slowly, one bin, one project, and one box of holiday decorations at a time. Before you know it, you’re parking in the driveway and tripping over a lawn mower just to take out the trash.
The trick is to do things in the right order. The biggest mistake people make is running out to buy storage bins, cabinets, and shelves right away. Those are actually the last step, not the first. You have to figure out what you’re keeping, where you want it to live, and how much space you're actually working with first.
Whether your garage is completely packed or you just need a better system that keeps things off the floor, tackling it in order makes the whole job way easier. In this guide, we'll walk you through the process step-by-step, including the critical planning steps most people skip.
Table of Contents
- Step 1: Decide how you'll use it
- Step 2: Empty and clean
- Step 3: Sort into five piles
- Step 4: Measure your garage
- Step 5: Create zones
- Step 6: Choose your storage
- Step 7: Stay organized
- Common mistakes to avoid
- When to call a professional
- FAQ
Step 1: Start by Deciding How You'll Use Your Garage
Before you move a single box, decide what your garage actually needs to do. Every choice after this depends on it.
Here are the questions worth answering first:
- Do you need to park inside? If yes, your vehicle takes up a good amount of floor space, and everything else has to work around it.
- Is it also a workshop? A workbench needs dedicated power, lighting, and wall space, which limits space available for cabinets or racks.
- Is it mostly for storage? If so, you can use the full height and depth of both side walls and plan around easy access.
- Does it need to do more than one job? Most do. Rank your priorities in order, because your top priority wins when layout choices conflict.
Whatever you land on, write your answer down. When you're 3 hours in and deciding where the bikes go, that note is what keeps you from filling the parking space.
Step 2: Empty Your Garage and Clean
Take everything out of your garage. Not most of it, all of it.
This step matters more than it seems. Items left sitting in a corner tend to stay there forever, even when the location makes zero sense. Pulling every item out of your garage forces you to make an active decision about every single thing before it earns a spot back inside.
Pick a clear, dry day and use your driveway as a staging area. If your space is completely packed, work one half or one section at a time so you aren't climbing over mountain piles.
Plan to block out a full day. Emptying, sorting, and putting a garage back together usually takes most of a weekend day, and you’ll likely want a second day for donation drop-offs and mounting new storage.
Once your floor is clear, sweep away debris and wash the concrete. Wipe down existing shelves and let them dry in the sun while you sort. This is the one time your floor will be completely empty, so if you’ve been thinking about applying a durable floor coating, this is also your best window.
Step 3: Sort Everything Into Five Piles
Start by setting up five clearly marked areas on your driveway: keep, sell, donate, relocate, and toss.
To keep the process moving quickly, use these simple rules for each pile:
- Keep: If you haven't used an item in the past year and it isn't a seasonal tool like a snowblower, let it go. Do the same for duplicate tools or gear.
- Relocate: This is the pile people usually forget. If an item belongs in the house, attic, or shed, put it here. Sorting it into "keep" guarantees it stays cluttering your garage forever.
- Sell: Set aside high-value items you no longer use, like a working lawn mower or a kid’s bicycle. Giving them their own spot keeps them from ending up right back on your shelves.
- Donate: Put usable items here that you don't plan to sell. Plan to drop them off the same week so the boxes do not quietly blend back into the garage background.
- Toss: Throw away broken items, expired chemicals, or junk that cannot be reused.
As you sort, keep in mind that some things shouldn't go back in the garage at all:
- Paint: Extremes in heat and cold break down paint fast. Freezing temperatures separate the liquids, leaving you with useless sludge.
- Propane tanks: Keep these outdoors. Even a small valve leak in an enclosed garage creates a serious fire hazard.
- Important documents and photos: Garages get humid, and paper acts like a sponge. Moisture warps pages, fades photos, and invites mold.
- Pet food, birdseed, and grass seed: Unsealed bags are an open invitation for mice and bugs. If you keep them in the garage, lock them in airtight plastic or metal containers.
- Electronics and canned food: Temperature swings ruin both. High heat spoils canned goods, and shifting temperatures ruin sensitive electronic circuit boards.
Be careful with disposal, too. Items like oil-based paint, old motor oil, car batteries, pesticides, and propane tanks cannot just go into the household trash. Most towns have specific drop-off locations or designated recycling days for hazardous waste, so check your local city site before loading up your car.
And one final tip: drop off that donation pile within a few days. If those boxes sit in your driveway or hallway for too long, they have a funny way of moving right back onto your garage floor.
Step 4: Measure Your Garage Before You Buy Anything
Measure your garage while it is completely empty before you buy a single hook, bin, or shelf. This step is what separates a plan that works effortlessly from a plan that almost fits.
Here's what to measure while your garage is still empty:
- Wall to wall and front to back: Knowing your actual dimensions tells you how much real usable space you have.
- Ceiling height at the lowest point: Check the clearance beneath your garage door tracks or opener rails. That number determines whether overhead racks will actually fit.
- Your biggest vehicle: Always measure your tallest car or SUV with the trunk hatch open. Overhead racks need to clear whatever actually parks underneath them.
- Open car doors: Park inside, open the doors fully, and mark where they land on the floor with painter's tape. Keep that zone completely clear.
- Walking room: Leave enough space to walk comfortably past a parked car. If you cannot carry a bin or grocery bag past your vehicle, the layout is too tight.
- Trash and recycling bins: These take up regular floor space. If you do not assign them a dedicated area now, they will end up blocking your car doors or garage path later.
Also, check two important things before you mount anything:
- Your wall type: Find out whether your walls are drywall over studs, bare studs, or concrete block, because each one takes a different fastener.
- Your ceiling beams: Find out which way your ceiling beams run, since overhead storage has to attach across them, not between them.
If your ceiling uses trusses, which look like triangles made of smaller boards instead of single thick beams, talk to a professional before hanging anything heavy. Trusses are designed to hold up the roof, not to hold extra weight hanging below them.
Step 5: Create Zones That Match How You Use the Space
With your measurements ready, group similar items together. Then, place each group based on two simple factors: how often you reach for it and who needs to access it.
Here is a layout strategy that works in almost any garage:
- Near the interior door: Everyday items. Shoes, sports gear kids grab on the way out, and your trash and recycling bins.
- Waist to shoulder height: Heavy items. This range is the easiest to lift from, making it the right home for tool chests and bulk supplies.
- High shelves and overhead racks: Seasonal and rarely used items. Holiday decorations, camping gear, and luggage.
- Back wall of the garage: Workbenches, power tools, and anything that requires setup time.
- Near the parking space: Car care supplies. Keeping wash soap, towels, glass cleaner, and wax in one spot beats hunting for them.
- Out of children's reach (ideally locked behind cabinet doors): Lawn chemicals, pesticides, and sharp tools.
Once your zones are set, rotate them seasonally. In-season gear moves forward; out-of-season gear moves back or up. Spending 20 minutes on this twice a year makes all the difference between a system you enjoy using and one you constantly work around.
Spring is the natural time for your first swap, since that is when most outdoor gear changes places. Check out our step-by-step guide on turning a seasonal clean-out into a lasting organized garage.
Step 6: Choose Storage That Fits What You Store
Now you are ready to pick out storage hardware. Always match the storage type to the exact items you are putting away:
Wall Storage
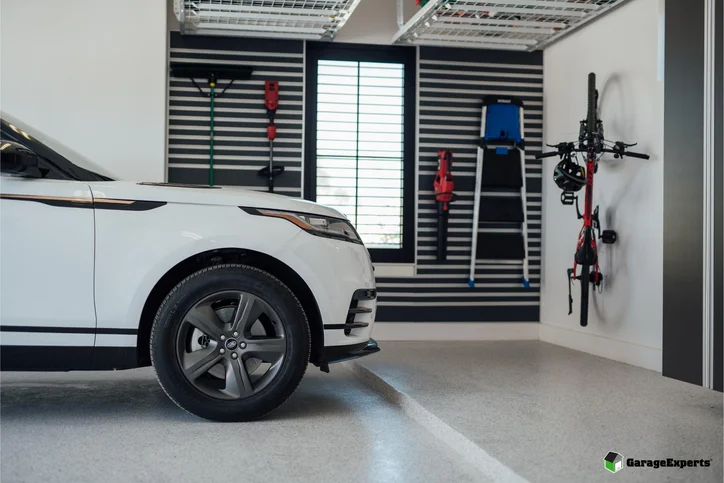
Wall storage is best for anything with a long handle or anything you reach for regularly. Rakes, shovels, brooms, and ladders belong on the wall instead of leaning against corners, while a simple pegboard works great for light hand tools.
Bikes hang well from heavy-duty wall hooks, and sports gear stays organized in open wire baskets where kids can grab balls without pulling everything else down.
A slatwall system handles heavier items smoothly, allowing you to move hooks and baskets around whenever your storage needs change.
Overhead Storage Racks
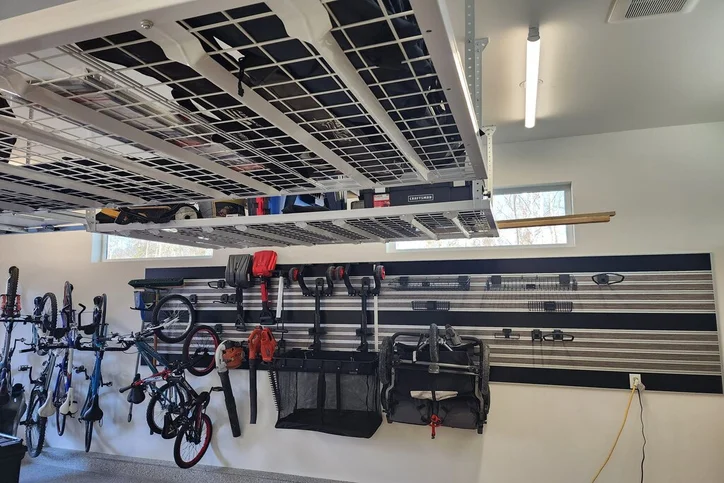

Overhead storage racks are best for bulky, lightweight items you only touch once or twice a year, like holiday decorations, coolers, camping gear, and luggage. Look for racks with a safety lip so bins cannot slide off, and adjustable drop heights so you can clear your vehicle safely.
Avoid storing heavy items up high, and keep anything you need monthly closer to eye level. If you do need regular access to overhead items, a motorized ceiling lift can help lower the rack safely.
Want a deeper look at maximizing your ceiling height? Read our complete guide on using overhead storage racks in your garage.
Garage Cabinets
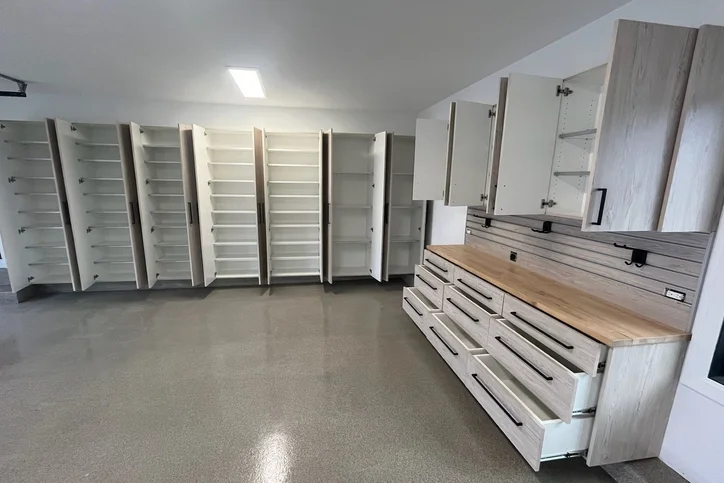
Garage cabinets are best for anything you would rather keep out of sight or safely locked away. They keep bulk supplies, cleaning products, and yard chemicals completely closed off from kids and pets.
Look for sturdy ¾-inch construction shelves and full backs. Thinner cabinet panels tend to sag over time once loaded up with tools and supplies.
Need help picking the right cabinet setup for your layout? Check out our guide on how to choose the right cabinets for your garage
Open Shelving
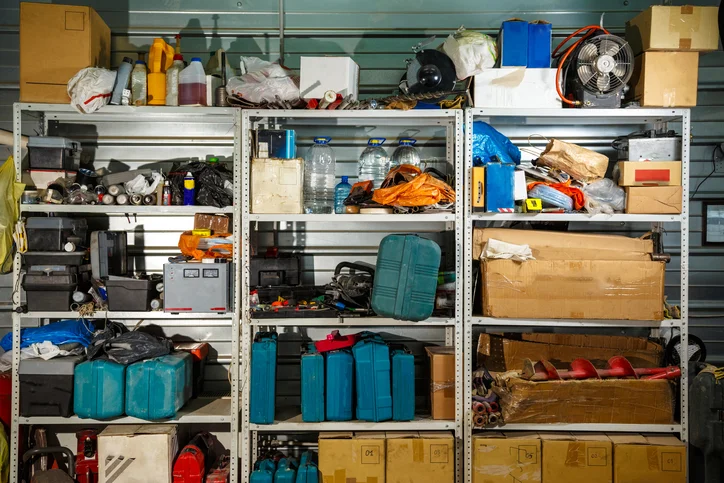
Open shelving works best for labeled bins and bulk supplies you want to see at a glance. Use clear bins for items you need to find fast, and label every bin anyway.
Place the heaviest bins on the lowest shelves, saving the top shelf for light, bulky items you rarely touch. Leave a few inches of clearance above each bin so you can lift it straight out without dragging it across the shelf.
If you use freestanding shelf units, always anchor them directly to the wall. A fully loaded shelf unit can tip over much faster than expected, especially when pulling a heavy bin off the top.
Workbenches and Tool Storage
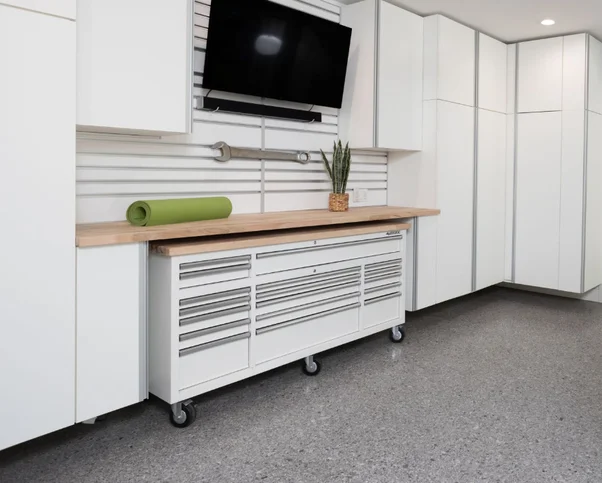
A dedicated workbench and tool setup is best if you do active projects in your garage rather than just basic storage. Place your bench against the back wall where you have room to stand and work without bumping into a parked vehicle.
Sort your tools by how often you use them. Keep the items you reach for on every project within arm's reach of the bench. Larger power tools belong in lower cabinet drawers or chests, where their weight is supported safely.
Concrete floors draw in moisture, which causes tools left sitting on the slab to rust fast. Keep all metal tools elevated on shelves or inside drawers. Storing tools in closed drawers keeps dust off items you only use a few times a year, and labeling drawers keeps you from opening five options to find one tape measure.
Keep power accessories organized, too. Mount chargers together in one dedicated station with a power strip so batteries aren't scattered across three different shelves. Keep screws, nails, and hardware in divided organizers rather than loose jars, and wind extension cords onto reels or hooks instead of tossing them in a pile.
Step 7: Keep Your Garage Organized Long-Term
The key to a long-lasting transformation isn't just the initial clear-out; it's staying on top of it. Keep your garage organized effortlessly with two simple habits: a 15-minute reset once a month, and a seasonal swap twice a year.
Once a month, spend 15 minutes returning items that have wandered away from their assigned space. Twice a year, rotate seasonal gear and do a quick donation pass.
Both habits only work if putting items away is effortless. Every single item needs a clear home that takes only a few seconds to reach. If returning something feels like a hassle, it will end up sitting on the floor.
The same rule applies to quick cleanups. Keep a broom and an all-purpose cleaner right in the garage so leaks and spills get handled before they turn into permanent floor stains. If a tough stain does set in, check out our guide on how to clean oil off a garage floor.
Common Garage Organization Mistakes to Avoid
Here are the most common mistakes people make when setting up a garage:
- Buying bins and hooks before clearing things out: You end up spending money organizing items you should have donated or thrown away.
- Mounting storage into drywall instead of wall studs: Drywall anchors might hold an empty rack, but they will pull out once loaded up with tools.
- Blocking the garage door tracks or opener rails: Always measure clearance first. Interference with moving door tracks is the main reason shelves have to come right back down.
- Storing heavy items overhead and light items at waist height: This is backwards, inconvenient, and a common cause of injury.
- Planning layout around your current car when you plan to buy a taller truck or SUV next year: Always account for future vehicle height.
When to Call in a Professional for Garage Organization
Plenty of garage cleanup can be done over a weekend on your own, and there is nothing wrong with basic hooks and a quick trip to the local hardware store.
However, calling in a professional makes sense when the actual installation gets complicated. Mounting heavy setups into concrete block, securing high overhead racks across the right ceiling joists, or fitting custom layouts around awkward angles goes much faster and safer with an experienced installer. Most custom installations can be completed in just a single day.
Professional installation also ensures your storage units fit seamlessly, hold serious weight safely, and come backed by a solid warranty rather than a store receipt.
Your concrete floor is another project worth handing off. Once your space is cleared out, applying a high-performance coating is the single best upgrade for making the whole room easy to sweep and keep clean.
Build a Garage That Stays Organized with GarageExperts®
Getting your garage organized is a great first step, but keeping it that way over time is what the right storage solution truly gives you.
At GarageExperts®, we design and install custom garage storage solutions built around how you actually use your space. From custom wood cabinets to slatwall systems and overhead storage racks, we create complete systems where every component works together.
We can transform your concrete floor, too. Our Garage FX® system pairs an epoxy base coat with a polyaspartic topcoat, delivering a durable surface that stands up to daily vehicle traffic and heavy use. Chemical spills and oil drips wipe right up instead of soaking in, keeping your space looking pristine.
Ready to stop fighting for space in your garage? Contact your local GarageExperts® today for a free estimate and 3D layout design.
Frequently Asked Questions
How much does it cost to organize a garage?
It depends on how much wall area you want to cover and whether you do the installation yourself. The main factors that drive cost are the total feet of wall space involved, whether you choose open shelving or custom closed cabinets, and the overall scope of the layout.
A simple hook rail and one shelf unit is an easy weekend project. A full wall setup with custom cabinets and overhead racks is a larger investment. Measuring your space and getting a clear custom estimate is the best way to get an accurate figure for your exact garage.
How do I organize my garage on a budget?
Start with a thorough clear-out. Decluttering costs nothing and instantly reduces the amount of storage hardware you need to buy. Next, invest in basic wall tracking before buying stacks of plastic bins. A simple set of wall hooks clears more floor space than a tower of containers, and it costs much less.
You do not have to tackle everything at once, either. Get your main wall organization set up first, live with the layout for a month, and add custom cabinets or overhead racks later once you see what storage gaps remain.
How can I maximize storage for my small garage?
Focus on vertical space. In a smaller garage, your walls and ceiling are the only unused areas available. Hang long-handled tools on wall tracks, move seasonal items up to overhead racks, and protect your floor space for your vehicle and daily essentials.